Turn Your Backyard Into a Garden Retreat with These Gazebo Secrets
Disclosure : This post may contain affiliate links or paid partnerships. I may earn compensation if you click a link or make a purchase, at no additional cost to you. See my disclosure for more info.
Let’s be honest.
Your backyard is out there right now. And you’re in here.
Not because you’re busy. Because there’s nothing out there worth going to.
No atmosphere. No comfort. No reason to set down your phone and just… be.
Just a stretch of lawn, maybe a sad patio chair, and the lingering sense that you could be doing more with that space.
So you go back inside.
And the backyard sits there, unused.
Sound familiar?
You’ve seen what’s possible. The Instagram gardens with the string lights glowing warm in the dusk. The gazebos with flowing curtains. The spaces that make you want to pour a drink and stay until midnight.
And you wonder: “Is that actually doable for me?”
You talk yourself out of it. Too pricey. Too much effort. You wouldn’t know how to start.
Another saved pin. Same backyard.
But here’s what nobody tells you.
Those dream spaces aren’t built by people with unlimited budgets. They’re built by people who stopped waiting and started doing.
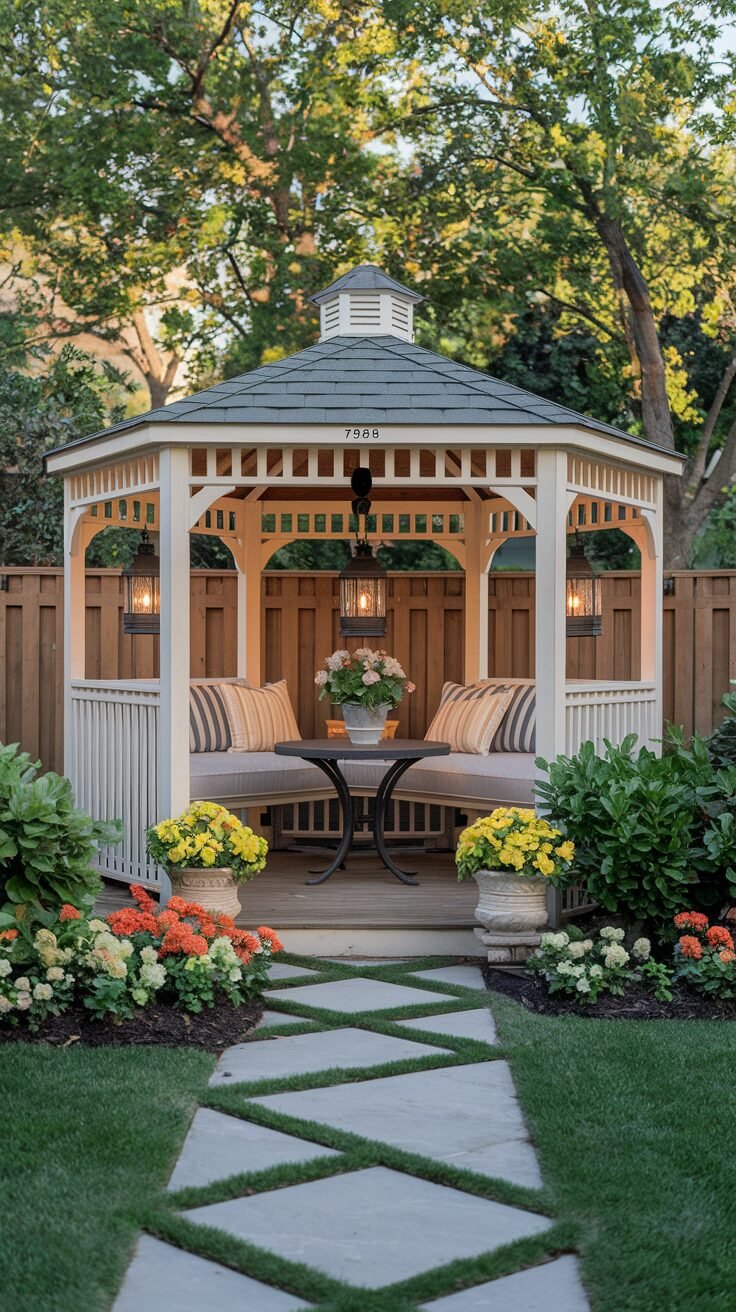
A well-placed, well-styled gazebo is the fastest, most effective thing you can do to transform a dead outdoor space into somewhere you actually want to spend time.
Not in some vague future.
This season.
Here’s exactly how to make it happen.
Why Your Backyard Feels Like a Place You Pass Through (And How a Gazebo Changes That)
Ask yourself why you actually like being in your living room.
It’s not the four walls. It’s everything inside them. A sofa you sink into. A lamp that casts warm light. A table for your coffee. A rug that grounds the whole space.
All of those things say one thing: “This place is for you. Sit down.”
Your backyard says none of that.
It’s wide open, undefined, and the brain has no idea what to do with it. So you pass through it.
A gazebo changes the equation.
It draws a boundary. It creates a destination. It gives your mind permission to stop.
But you have to set it up right.
Stick a gazebo in the middle of an empty lawn with nothing around it and you’ve just moved your boring problem ten feet to the left.
The magic isn’t in the structure. It’s in what you build around and inside it.
That’s what these tips are for.
1. Choose a Gazebo That Fits the Yard You Have, Not the Yard You Imagine
This is where most people go sideways before they even start.
They spend a week drooling over a sprawling wooden pavilion on some home improvement blog. It looks incredible. It’s enormous. And it was built for a property that could host a small wedding.
Yours cannot.
But they buy it anyway.
And then they stand in a backyard that feels like a parking garage because the structure ate every inch of usable space.
Work with your actual yard. Not the fantasy version of it.
Smaller yard? A compact 8-foot pop-up gazebo or a trim metal pergola is perfect. It defines your outdoor room without crowding out everything else.
Medium-sized yard? A 10-to-12-foot hardtop gazebo gives you genuine living space. Enough for a seating set, a side table, and room to breathe.
Larger yard? Go bigger. A wooden pavilion with distinct zones — lounge, dining, maybe a hammock corner — creates an entire outdoor world.
And don’t overlook style.
Look at your house before you buy a thing. Modern home, clean lines? A minimalist aluminum or steel frame fits. Cottage or farmhouse feel? Opt for wood with a more traditional shape. A mismatch looks jarring no matter how good each piece is on its own.
Match the vibe. Everything flows from there.
2. Find the Spot Where You’ll Actually Want to Sit
The logical move seems obvious: plant the gazebo in the center of the lawn.
Please don’t.
The center is usually the hottest, most exposed, least interesting spot in the whole yard. And if it’s also far from the back door, you’ll stop visiting it within a week.
Do this instead: spend a real afternoon outside before you commit to a location.
Track the sun. Note the wind direction. Sit in different spots at different times and notice what feels good and what doesn’t.
Ask yourself three questions:
Where is natural shade available? Placing the gazebo there means you’ll use it even on hot days in midsummer.
How many steps from your kitchen door? If it takes effort to carry a cold drink out there, the novelty will wear off fast. Keep it convenient.
What’s the view from inside? You want to be looking at your garden, your trees, maybe a water feature. Not directly at a fence or your neighbor’s garage.
Get the placement right and you’ll use the space constantly. Get it wrong and it becomes a very expensive decoration you look at from the kitchen window.
Take your time here. The rest of the project depends on it.
3. Install a Proper Surface Underneath (Grass Makes a Poor Floor)
You’ve picked the perfect gazebo. You’ve found the ideal location.
Now imagine it rains. You go out anyway because the roof keeps you dry.
And you sink into soft, wet mud the moment you sit down.
That’s what happens when you skip the floor.
A proper surface is what separates a gazebo setup that feels like a temporary campsite from one that feels like a genuine outdoor room.
Pea gravel is the easiest and most affordable option. Lay landscape fabric first to suppress weeds, then pour 2 to 3 inches of gravel on top. Drains well, looks great, satisfying underfoot.
Stone pavers or flagstone require more work upfront but the finished result is hard to beat. Solid, elegant, permanent.
Composite decking is the top-tier option. Warm, splinter-free, nearly maintenance-free, and built to last decades.
No matter what you choose, level the ground first.
An uneven base means rocking chairs, tilting tables, and water that pools where you least want it. Take the time to grade it properly. It’s tedious and worth every minute.
4. Build Your Lighting in Layers Like a Designer Would
Nothing — absolutely nothing — transforms an outdoor space faster than good lighting.
Not a spotlight blasting the whole yard into overexposed daylight. Layered light. Warm, intentional, thoughtfully placed.
This is how it works:
The ambient layer. Drape string lights across the gazebo ceiling or weave them through the rafters. Warm white bulbs only — they mimic candlelight and make everyone look good.
The task layer. A compact battery lantern or table lamp gives you enough focused light to eat, read, or actually see the faces of the people you’re talking to.
The accent layer. Solar stake lights around the perimeter or LED strips along the base edges make the whole structure glow at night.
Three layers. That’s the secret that makes people ask, “Did you hire someone to do this?”
And since most of these options run on solar, there’s no wiring required. Just install, let the sun charge them, and enjoy the results every evening.
5. Create Privacy So You Can Actually Relax
Relaxing while someone can see you isn’t really relaxing.
Your brain stays alert when it thinks it’s being observed. That low-grade awareness never fully switches off. And your oasis becomes just another place you feel slightly on display.
Fix the sightlines.
Outdoor curtains are the fastest solution. Weather-resistant panels hung on gazebo posts. Open them for airflow, close them for a sense of enclosure. They take twenty minutes to hang and look genuinely beautiful.
A trellis with climbing plants is the more organic approach. Attach one on an exposed side, plant jasmine or clematis at the base, and within a single growing season you’ll have a fragrant living screen.
Tall planters work too. Large bamboo or ornamental grasses in big planters placed strategically along exposed sides provide immediate height and screening without being permanent.
Just leave at least one or two sides open. You want shelter, not isolation. Let the garden stay part of the experience.
6. Set It Up Like a Real Room, Not a Parking Spot for Chairs
One plastic chair. Shoved in the corner.
Nobody designed that. Nobody considered it. It’s just there.
Don’t do that to your gazebo.
Approach it the same way you’d approach furnishing an indoor room. With intention.
Seating comes first. Deep-cushioned outdoor chairs or a proper outdoor loveseat with thick cushions you actually want to sink into. If you feel the urge to get up after five minutes, the seating is wrong.
Add a surface. A coffee table, a side table — anything with a flat top. Without one you’re holding your drink all evening, which is nobody’s idea of relaxing.
Then layer in texture and softness.
Outdoor throw pillows in colors you love. A light throw for cooler nights. An outdoor rug underneath everything to anchor the space and make it feel cohesive.
These additions are inexpensive. But they’re the difference between a structure that sits unused and a space that pulls you outside every evening.
7. Let Plants Do the Work of Making It Feel Like Part of the Garden
Drop a gazebo in the middle of a bare yard and it looks like it was delivered yesterday and never unpacked.
Plants are what integrate it. They blur the line between structure and landscape and make the whole thing look intentional.
At the base: low groundcover, ornamental herbs, or flowers that soften the foundation. Lavender is ideal — tough, beautiful, and it perfumes the air around you.
Around the perimeter: medium shrubs or grasses that create a natural visual frame, as if the gazebo grew up out of the garden rather than being placed on top of it.
Inside the structure: potted ferns on plant stands, trailing ivy in hanging baskets overhead, or a small herb planter on the table that you can actually use when you cook.
Layer it: low, medium, tall. This layered structure creates a sense of lushness and depth that makes even a modest yard feel like a private garden.
You can’t overdo the greenery. More plants always means more oasis.
8. Design for All Your Senses, Not Just What Looks Good in Photos
A beautiful space that only works visually is only half finished.
Real sanctuaries wrap around all of you.
Sound matters. A small solar water fountain nearby creates a gentle, steady background sound that muffles traffic, neighbors, and the general noise of the world. Your shoulders drop within minutes.
Wind chimes add character too — but pick ones with a low, mellow tone. The tinny high-pitched kind gets annoying faster than you’d expect.
Scent anchors the experience. Pot up rosemary, mint, or lavender nearby. A breeze through those plants is genuine aromatherapy at zero cost.
A citronella candle on the table handles both ambiance and mosquito deterrence simultaneously.
Texture completes it. Smooth wood, soft fabric, cool stone, rough wicker. Variety of touch signals richness and comfort to your nervous system in ways purely visual design never can.
When every sense is engaged, the gazebo stops being an outdoor structure.
It becomes a full experience.
9. Protect Your Investment Before Weather Does the Damage
Nobody wants to talk about this part. It’s not exciting.
But skip it and watch everything you’ve built quietly fall apart over one rainy season.
Mold on cushions. Rot at the base of wooden posts. Rust creeping across metal joints. A canopy that shreds in the first serious wind.
None of that has to happen.
Cushions: use water-resistant covers or quick-dry foam inserts. When storms are forecast, two minutes of moving them into a deck storage box saves them completely.
Wood: seal or stain it every season or two. A half-day of work buys years of structural life.
Metal: check every spring for rust spots. A small can of rust-resistant spray paint, applied early, stops the problem before it spreads.
Fabric panels and canopy covers: take them down before winter or serious storm weather. Store them dry and folded. They’ll last indefinitely.
A little maintenance once or twice a year means you never have to rebuild. That’s the deal.
10. Secure the Structure So It Stays Where You Put It
This is the last tip and the one you cannot skip.
Wind is unpredictable and it does not care how much you spent on your setup.
An unanchored canopy gazebo in a strong gust becomes a spinning projectile. It’s not a dramatic metaphor. It actually happens. Fence damage. Car damage. Worse.
Soft-top gazebos: ditch the thin wire stakes that came in the box. Use heavy-duty ground anchors and add sandbag weights to every leg. If you live somewhere with serious wind, add guy ropes for extra security.
Hardtop and permanent wooden structures: bolt them to a concrete slab or poured footings. Not optional. Not something to figure out later.
Anchoring is a one-time task. Do it properly upfront and you can sit through a thunderstorm without once worrying about where your gazebo is headed.
Secure it. Then forget about it. That’s what an oasis is supposed to feel like.
The Only Thing Left Is to Begin
You’ve got the roadmap.
Ten steps. All of them actionable. None of them require a contractor or a massive budget.
But here’s the thing: none of it matters if you don’t start.
Don’t try to do everything at once. Pick one thing from this list.
Just one.
Hang the string lights. Lay the outdoor rug. Put a lavender plant at the corner.
One thing becomes two. Two becomes five. And one day soon you’ll be sitting in that gazebo in the early evening, drink in hand, looking around at what you built, and the feeling that comes over you won’t be satisfaction exactly.
It’ll be something quieter than that.
Peace.
Because this place exists. You made it exist.
Your backyard has been waiting.
Stop planning.
Go build it.
🔍 Yoast SEO Checklist
🔍 Focus Keyphrase: gazebo garden oasis
📌 SEO Title (< 60 chars): How to Create a Cozy Garden Oasis with Gazebo Tips
🔗 Slug (< 60 chars): cozy-garden-oasis-gazebo-tips
📝 Meta Description (< 155 chars): Transform your backyard into a cozy garden oasis with these expert gazebo tips on placement, lighting, privacy, and more. Start building your retreat today!